Custom editor controls in Unity - Part 1: Events
I frequently develop custom controls for custom editor windows, inspectors, property drawers, etc when working on Unity projects to ease project workflows. People often ask how I create these controls so I thought that I would dedicate a blog post towards it for anyone that might be interested.
Unity’s editor interfaces are an IMGUI (immediate mode) type of GUI which means that for the most part custom editor interfaces do not need to maintain control specific state (although they can when necessary!). This is nice since controls can spontaneously pop into or out of existence based on the current values that are flowing through the GUI.
For example, in a traditional GUI you might have something like this:
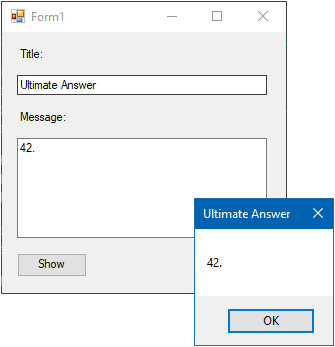
public sealed class MyForm : Form
{
    private Timer timerUpdateUI = new Timer();
    private Label lblTitle = new Label();
    private TextBox txtTitle = new TextBox();
    private Label lblMessage = new Label();
    private TextBox txtMessage = new TextBox();
    private Button btnShowMessage = new Button();


    public Form1()
    {
        this.InitializeComponent();
    }


    public bool HasInputsToShowMessage {
        get {
            return !string.IsNullOrEmpty(this.txtTitle.Text)
                && !string.IsNullOrEmpty(this.txtMessage.Text);
        }
    }


    private void Form1_Load(object sender, EventArgs e)
    {
        // Initialize properties of the controls.
        this.timerUpdateUI.Interval = 50;
        this.timerUpdateUI.Tick += this.timerUpdateUI_Tick;
        this.timerUpdateUI.Start();

        this.lblTitle.Text = "Title:";
        this.lblTitle.Location = new Point(15, 15);
        this.lblTitle.AutoSize = true;

        this.txtTitle.Location = new Point(15, this.lblTitle.Bottom + 5);
        this.txtTitle.Size = new Size(250, 24);

        this.lblMessage.Text = "Message:";
        this.lblMessage.Location = new Point(15, this.txtTitle.Bottom + 15);
        this.lblMessage.AutoSize = true;

        this.txtMessage.Multiline = true;
        this.txtMessage.Location = new Point(15, this.lblMessage.Bottom + 5);
        this.txtMessage.Size = new Size(250, 100);

        this.btnShowMessage.Text = "Show Message";
        this.btnShowMessage.Location = new Point(15, this.txtMessage.Bottom + 15);
        this.btnShowMessage.Size = new Size(70, 24);
        this.btnShowMessage.Click += this.btnShowMessage_Click;

        // Add them to the form so that they recieve UI events.
        this.Controls.Add(this.lblTitle);
        this.Controls.Add(this.txtTitle);
        this.Controls.Add(this.lblMessage);
        this.Controls.Add(this.txtMessage);
        this.Controls.Add(this.btnShowMessage);
    }

    private void timerUpdateUI_Tick(object sender, EventArgs e)
    {
        // Disable the "Show Message" button when required inputs are missing.
        btnShowMessage.Enabled = this.HasInputsToShowMessage;
    }

    private void btnShowMessage_Click(object sender, EventArgs e)
    {
        if (this.HasInputsToShowMessage) {
            MessageBox.Show(this.txtMessage.Text, this.txtTitle.Text, MessageBoxButtons.OK);
        }
    }
}
A timer was used in the above example to enable and disable the “Show Message” button depending on the value of the title and message inputs. The timer ticks at a rate of 50 milliseconds so that the UI appears responsive.
One of the drawbacks with this type of GUI is that you have to maintain the control instances… they have to be constructed when they are required and then cleaned up when they become redundant.
Here is a similar window but this time with Unity’s immediate-mode style GUI:
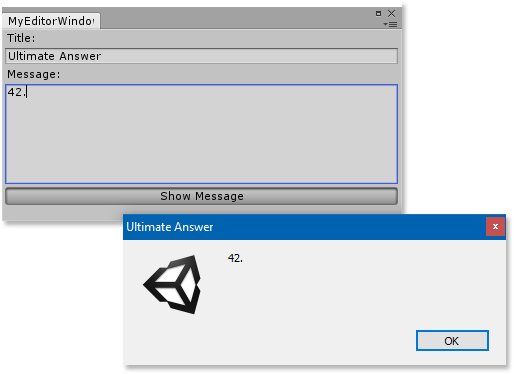
public sealed class MyEditorWindow : EditorWindow
{
    private string inputTitle = "";
    private string inputMessage = "";


    public bool HasInputsToShowMessage {
        get {
            return !string.IsNullOrEmpty(this.inputTitle)
                && !string.IsNullOrEmpty(this.inputMessage);
        }
    }


    private void OnGUI()
    {
        GUILayout.Label("Title:");
        this.inputTitle = EditorGUILayout.TextField(this.inputTitle);

        GUILayout.Label("Message:");
        this.inputMessage = EditorGUILayout.TextArea(this.inputMessage, GUILayout.Height(100f));

        EditorGUI.BeginDisabledGroup(!this.HasInputsToShowMessage);
        {
            if (GUILayout.Button("Show Message")) {
                EditorUtility.DisplayDialog(this.inputTitle, this.inputMessage, "OK");
            }
        }
        EditorGUI.EndDisabledGroup();
    }
}
Notice how much simpler it is to dynamically enable or disable the “Show Message” button depending on whether the title and message inputs are filled. There is no need to have a timer to check for changes to the title and message inputs since the button is redefined every time Unity processes a GUI event (be that a layout, repaint or input event).
Since the controls only pop into existence whilst GUI events are being handled; they are aware of the current event without having to route messages throughout the window’s hierarchy of controls. There is also no need for the custom editor window to maintain any special control specific state aside from the actual input values.
Extra- I highly recommend watching the following video on YouTube which explains the theory of how IMGUI’s work (not Unity specific): Immediate-Mode Graphical User Interfaces - 2005.
See: Part 2: Buttons